Creating Surveys
Citizen Voice survey tool is an open-source map-based tool to collect data from citizens and other local actors. The tool allows for conventional types of survey questions, such as multiple choice, and map-based questions, including the possibility to add pins and draw polygons on a map.
The best approach to create such a survey(s) for your own projects is to run the application in a Docker container and create a superuser.
Logging in as a Superuser in the Django Administration
These steps will walk you through to create a superuser for the Django application running inside the Docker container.
Prerequisites
Docker and Docker Compose installed on your machine.
A running Django application managed by Docker Compose explained in Step 5: Build and Run the Project of Installation Guide.
1. Access the Docker Container
First, you need to access the Docker container where your Django application is running. Open your terminal and execute the following command:
docker compose exec djangoapi /bin/bash
Warning: If you encounter an error stating that /bin/bash is not found, your container might be using a different shell. Try using /bin/sh instead.
2. Create a Superuser
Once you are inside the container, use Django’s createsuperuser management command to create a superuser:
python manage.py createsuperuser
Follow the prompts to enter a username, email address, and password for the superuser.
3. Access the Django Admin Interface
After creating the superuser, you can access the Django admin interface by navigating to http://localhost/api/admin in your web browser. Use the credentials you set up in the previous step to log in.
Troubleshooting
Verify Container Status: Ensure that the container is running. You can check the status of your containers with:
docker-compose ps
By following these steps, you should be able to create a superuser and access the Django admin interface in your Dockerized Django application.
Creating a Survey as a Superuser in Django Administration
1. Access the Docker Container
Once you’re in the repository, run
docker-compose --env-file .env up --buildto go to the local administrator page.Log in using your credentials creating in Step 2: Create a Superuser
Upon successful login, you will see the Django administration dashboard as shown below:
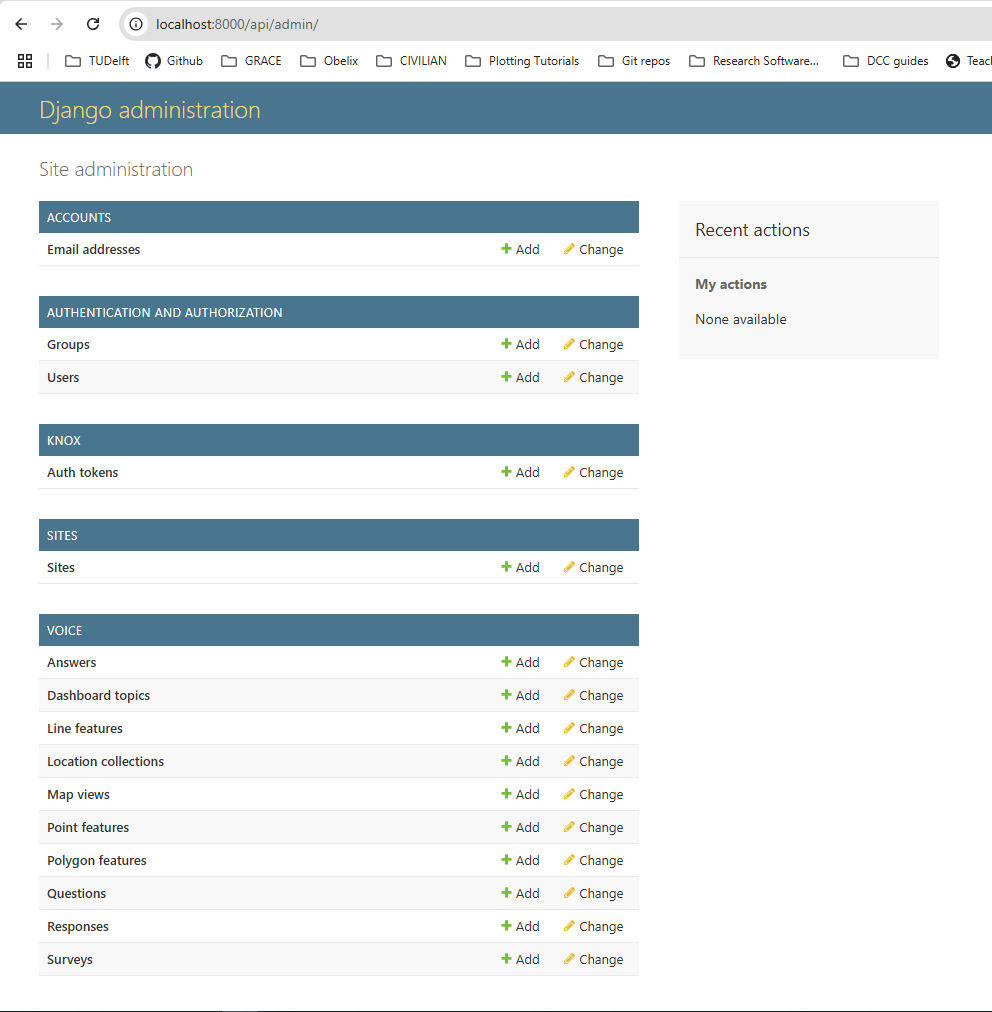
2. Create a New Survey
In the “VOICE” section, click on the + Add button next to “Surveys” to create a new survey.
You will be redirected to the “Add survey” page where you can input the survey details such as name, description, visibility settings, and active days.
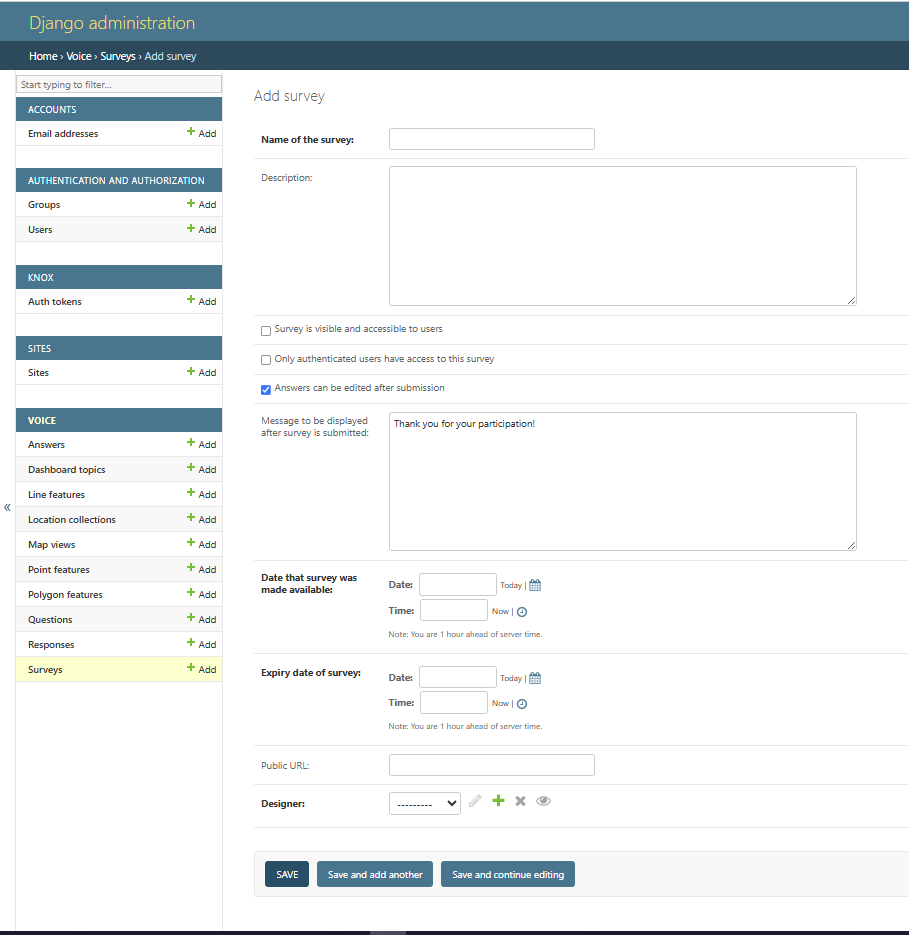
Fill in all the required fields:
Name of the survey: Enter a descriptive name for your survey.
Description: Provide a brief description of the survey.
Visibility and Access: Configure who can see and access the survey.
Active Days: Set the duration for which the survey will be active.
Message to be displayed after submission: Customize the thank you message.
Public URL: Optionally, set a public URL for the survey.
Designer: Selec the user this survey belongs to
Once all the information is entered, click the Save button to create the survey.
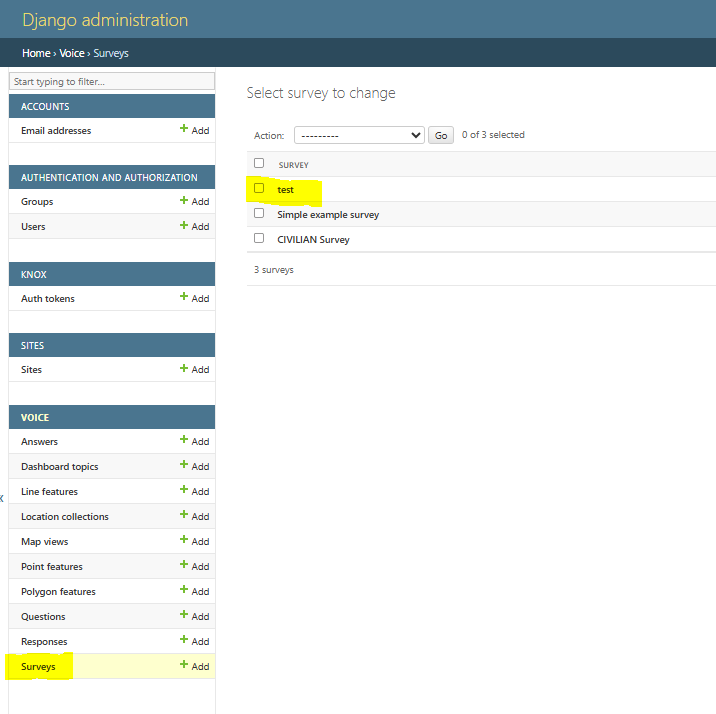
3. Verify Survey Creation
After saving, your survey will be listed in the “Surveys” section of the dashboard.
You can verify the creation by checking the surveys list, where your new survey should appear.
4. Add Questions to the Survey
To add questions to your newly created survey, navigate to the “Questions” section and click the + Add button.
On the “Add question” page, fill in the question details such as the question text, explanation, and type of question.
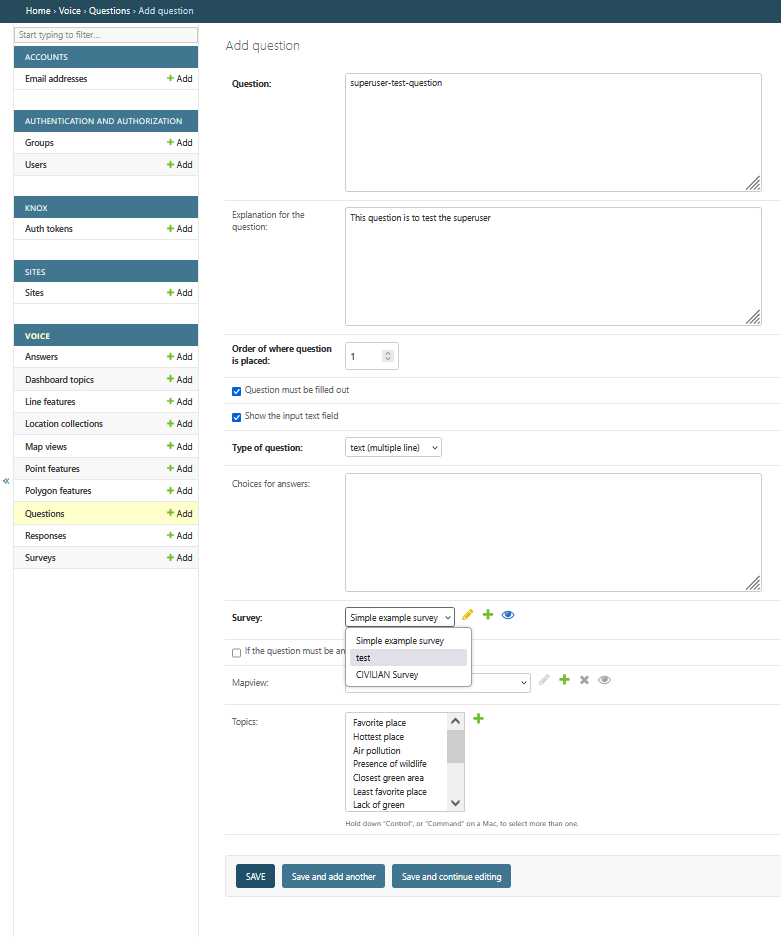
Link the question to your survey by selecting the survey name from the “Survey” dropdown menu.
After entering all the details, click the Save button to add the question to the survey.
Repeat this process to add all the questions that belong to the survey.
5. Finalize and Review
Once all questions are added, navigate back to the surveys list to ensure everything is set up correctly.
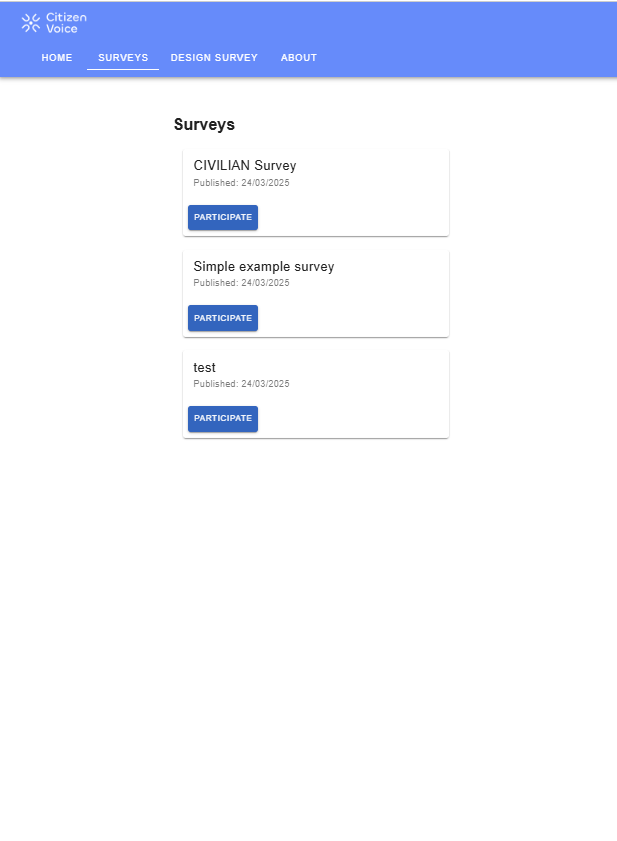
Your survey is now ready and accessible under the “Surveys” tab in your running instance of the app.
After completing the survey setup, log out from the superuser account to secure your session.
By following these steps, you can successfully create and manage surveys using the Django administration interface.s